Service Notice

SeaLife Micro 2.0 Underwater Camera

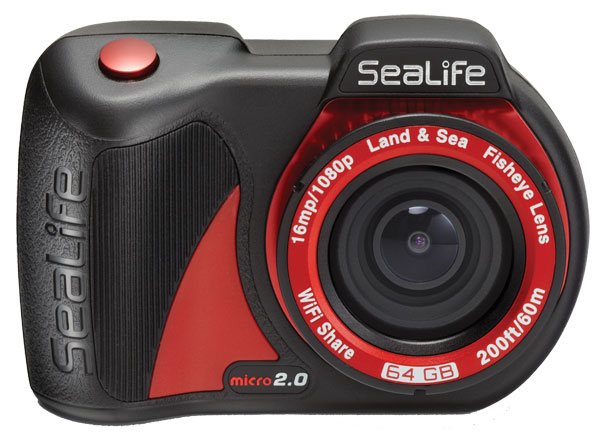
We have become aware that certain Micro 2.0 models may contain an electrical fault with a USB contact that may cause the camera to not power on while underwater.  Below are symptoms and details on affected cameras and steps to correct the problem.


Date:  July 30, 2018


Applies to:  Micro 2.0 cameras manufactured from May 2018 to July 2018 and serial number between E175200001 through E175200720.


Symptoms:
Camera not powering on underwater (salt water only).  The gold coating on the #2 USB contact (2nd contact from tripod mount) will begin corroding after a several dives. When this contact corrodes a short circuit may occur between the #1 and #2 contacts causing the camera to lock-up and not power on while underwater.  The camera may be powered on again when not underwater after drying the contacts and forcing off the camera by pushing and holding the power button for 10 seconds.  The above situation only occurs in saltwater and not in fresh water.


Solution:
Return the camera to the SeaLife Service Center for warranty repair or replacement.

For USA residents, please complete the service submission form or call/email SeaLife for return authorization at the contact information at bottom of this notice.

For residents outside USA, please contact the distributor/service center in your country.  The SeaLife website Dealer Locator lists all distributors by country.


Temporary Solution:
For those currently on a dive trip, there is a temporary solution that will allow the affected cameras to function properly while underwater:  Apply a small piece of electrical or clear tape over the USB contacts and install the rubber USB protective cover over the tape.  This will prevent the USB contacts from short circuiting underwater.  Firmly press down on the tape so that it forms around the USB contacts and adheres to the plastic housing around the contacts (See photo below).

USB contact pins (without tape)
electrical tape usb cover
Electrical tape applied over the USB contacts

Remove the tape after your dive, rinse the camera in fresh water for 20 minutes and dry before charging, PC connection or storage.  Clean the USB contacts using clean cotton cloth moistened with isopropyl alcohol after each dive to remove any tape residue or other contaminates. Apply a new piece of tape before each dive.  Applying tape is not intended as a permanent solution but only as a temporary fix for those presently on a dive vacation or using the camera.

For all other product support questions, please refer to the online troubleshooting information located in the Technical Support section of the SeaLife website.

Back to Index

1. SeaLife Micro Cam App Update V3.5

SeaLife has released SeaLife Micro Cam app update version V3.8 on August 30, 2023. The app update includes general updates for Android 13 compatibility. The app update is available for free download on Google Play store.

If you encounter any app performance issues, please contact the USA SeaLife Service Center at service@sealife-cameras.com or contact the SeaLife distributor in your country by clicking here: http://www.sealife-cameras.com/authorized-dealer-locator

Back to Index


2. Storage I/O Error

If the Micro 2.0 camera displays a “Storage I/O” error message, it means the camera has a solid state memory failure. The camera is unable to save pictures and videos to memory. It is also not possible to view or download pictures or videos saved in the camera’s memory using a computer or wirelessly through the SeaLife Micro Cam. Repair service is necessary. In most cases, your local authorized SeaLife Service Center can retrieve files from the camera’s memory.

Please contact the USA SeaLife Service Center at service@sealife-cameras.com or contact the SeaLife distributor in your country by clicking here: https://www.sealife-cameras.com/dealer-locator/

Back to Index


3. Lens fogging or water visible inside camera, spray-on sunscreen

The Micro 2.0 is permanently-sealed and depth tested to ensure the camera is waterproof.  Here are two known causes for the camera to take on water:

a) Spray-on sunscreen damaging to reefs and plastics

It’s a known fact that many sunscreens contain chemicals harmful to reefs and marine life. These same chemicals are also damaging to some plastics, including polycarbonate commonly used to manufacture underwater camera housings and diving equipment.   Test results confirm that spray-on sunscreens are particularly aggressive causing a chemical reaction that can make the material become brittle and crack.

SeaLife UW cameras/lights and some accessories are manufactured from a high-quality grade of polycarbonate. Polycarbonate is used in many products where high impact resistance and/or optical transparency is important. Such products include sports safety equipment, medical devices, automotive parts and electronic device housings, to name only a few. Despite polycarbonate’s impressive engineering characteristics and expansive presence in modern life, it is unfortunately susceptible to damage from some sunscreens.

We highly recommend using sunscreens that are advertised as safe for oceans and reefs.  If you use a spray-on sunscreen, never apply it around your diving equipment or UW cameras/lights. Always wash your hands after applying sunscreen to avoid contaminating plastic material when handling it.   Soak and rinse your cameras, lenses and lights for 20 minutes and allow to completely dry before storage.

b) Caution when connecting accessory to tripod mount

Do not connect any accessory to the camera’s ¼-20 tripod mount where the screw length exceeds 0.3” (7.5mm).  Using a ¼-20 screw that is too long will bottom out in the tripod hole and create a high degree of stress to the camera housing material that may result in cracks and consequential flooding.

Also, never apply thread-locking compound or any chemicals to the tripod mount area.  These compounds may cause chemical reaction that permanently damages the camera housing material and consequential flooding.

Back to Index


4. Firmware updates

Here is the list of firmware versions for the Micro 2.0 camera based on the camera’s serial #:

Serial # starts with             Firmware version

C                                      V1.44

D                                      V3.44

E                                      V5.47

F                                      V6.52, V6.56 or V6.58 (all versions work the same)

Note:  No updates have been released for cameras with serial # starting with D, E and F.  If you have a Micro 2.0 camera with serial # starting with C, please update it to V1.44.

To download latest firmware, please visit the SeaLife website.  Click this link:  http://www.sealife-cameras.com/firmware

Back to Index


5. Camera not powering on

Here are the most common causes and solutions for the Micro not powering on:

  1. Not pushing the power button long enough. Make sure to push and hold the power button for a full 2 seconds until the “Micro 2.0” startup screen is displayed on the LCD display. The camera will not power on if the power button is released after the startup sound but before the startup screen.
  2. Camera was accidently set to “boot” mode (engineering mode). Pushing the Playback and Video buttons at the same time while the camera is powered off will activate boot mode. This may happen accidently when tightly packing camera into your luggage or carry case.  The camera will not power on normally when in boot mode. Pushing and holding the power button for 10 seconds will exit engineering mode.  Note: When the camera is in boot mode, the battery will drain below minimum voltage level needed to power on the camera, so the camera may still not power on after exiting boot mode.  Follow these steps in order:
  • Push and hold the power button for 10 seconds to force off the camera processor. Then, try powering on the camera.  If camera still does not power, proceed to the next step.
  • Connect camera to the wall charger.  Then, push and hold the power button for a full 10 seconds.  The green status light near the USB contacts should turn on.  See below picture.  Allow camera to charge for 3 hours.  Note:  The camera may not respond to the wall charger.  In other words, the camera may not display PC/Charge/Ext Power options when connecting to the charger.  That’s okay – keep the camera connected to the charger for 3 hours. Remove from wall charger and power on the camera.
  • If you don’t see the green status light as described above, refer to the below troubleshooting with headline “Camera won’t connect to computer and/or charge”. After following that advice, repeat above steps.

Note: If the camera is still not powering, there is most likely some other internal damage and service is required. Please contact the USA SeaLife Service Center at service@sealife-cameras.com or contact the SeaLife distributor in your country by clicking here: https://www.sealife-cameras.com/authorized-dealer-locator

Back to Index


6. Unable to make wireless connection or download pictures/videos with SeaLife Micro Cam app

To correct wireless connectivity and downloading issues with the SeaLife Micro Cam app, please follow these steps:

  1. For Micro 2.0 cameras that have serial # starting with “C”, update the firmware to V1.44. To download latest firmware, please visit the SeaLife website. Click this link: http://www.sealife-cameras.com/firmware
  2. Check that the camera is running the latest SeaLife Micro Cam app version and update the app if a new version is available. To check if your app is using the latest version, go to Apple’s App Store for iPhones/iPads or Google Play Store for android smart phones and tablets. You will see “Update” if an update is available.  You will see “Open” if the latest app version is already installed on your device.
  3. It is also recommended to update your smart phone or tablet to the latest operating system. Check your phone/tablet settings for available updates.
  4. Some smart phones and tablets will automatically switch to cellular data even though you have established a WiFi connection with the camera. The cellular data connection overrides the WiFi connection and prevents the SeaLife Micro Cam app from communicating with the camera. The solution is to temporarily turn off your phone’s cellular data and then establish WiFi connection with the camera.
  5. If you have installed a VPN [virtual private network] app on your smart phone or tablet, disable the VPN before attempting to establish wireless connection with the Micro 2.0 camera. The VPN app may interfere with the ability to wirelessly connect to the cameras.
  6. Uninstall and reinstall the app. Pictures previously downloaded to the app will not be deleted because those files are also saved to your phone/tablet photo gallery.

If you are still experiencing wireless connection issues, please contact the USA SeaLife Service Center at service@sealife-cameras.com or contact the SeaLife distributor in your country by clicking here: https://www.sealife-cameras.com/dealer-locator

Back to Index


7. Can’t wirelessly download certain videos to iPhones/iPads using SeaLife Micro Cam app

An orange exclamation mark  that appears on the video thumbnail indicates the video did not download.  You should see a green check mark .  If you see the exclamation mark, the issue is most likely related to downloading videos recorded in 1080-60fps or 1296p-30fps format, which cannot be saved to iPhone/iPads because of an Apple iOS system limitation.  There should be no problem wirelessly downloading 1080p-30fps but 1296p-30fps cannot be played back or downloaded to iOS devices.  1080p-60 fps can be played back on the app but not downloaded to camera roll.   Recent iOS updates (version 11.4.1 or higher) do allow downloading 1080p-60fps videos.

Back to Index


8. Cannot wirelessly download picture/videos to SeaLife Micro Cam app with Android Device

Normally, when trying to download pictures/videos from the SeaLife Micro camera to your Android device, an orange check mark  appears on the selected files you want to download.  The orange check mark  will turn to a green check mark after the file has been downloaded.  If you see a green check mark before attempting to download file, the same file [or another file with the same file name] has been previously downloaded.  In other words, you can’t download a file with the same file name twice.

The Micro 2.0 camera maintains a continuous file naming sequence from MICR0001 to MICR9999*.  After MICR9999, the file name sequence will restart at MICR0001.  Another way to force the camera to restart at file name MICR0001 is to perform System Reset immediately after formatting or deleting ALL files.

  1. If you encounter the above downloading issue, we recommend following these steps:
  2. Go to your Android device photo gallery app and locate the folder named “SeaLife Micro Cam”.
  3. Rename that folder to “SeaLife Micro Cam Archive 1”.  There is a settings tab on the top right of your device display that shows a drop down menu with “Rename” as one of the options.
  4. Renaming the folder will not delete any of the pictures/videos saved in that folder – you are only changing the folder name.
  5. Wirelessly connect the camera to your Android Device and open the SeaLife Micro Cam app.
  6. Go to the app’s playback mode and select the settings [gear] icon on the top right.
  7. Select “Clear Cache”.  This will not delete any files that you previously downloaded.  It will only reset the app’s hidden memory.

That’s it.  You will now be able to download files from the Micro camera to your Android device.  The app will automatically create a new folder in the device photo gallery app called “SeaLife Micro Cam”.

* This applies to Micro 2.0 cameras running the latest firmware version – V1.44 (Serial # starting with C), V3.44 (Serial # starting with D) or V5.47 (Serial # starting with E).  Previous firmware version will restart the file # sequence when only doing System Reset or Format.

Back to Index


9. Deleting Pictures and Videos

You can delete an image file by pushing and holding the shutter button while in thumbnail view.

  1. Select the thumbnail image you want to delete.
  2. Push and hold shutter button for 2 seconds. The camera will display “Delete this file” or “Delete all files”.
  3. Select the desired option using the up or down buttons. The camera will display “No” or “Yes”.
  4. Select Yes to delete or select No if you do not want to delete the file.

Note: You may also format the camera to delete all files. See page 37 for information about formatting the camera.

Back to Index


10. Can’t play 1296p video resolution

1296p video resolution is a larger 3 megapixel frame size and compatible with the following video players: Apple QuickTime Player, DivX Plus Player, YouTube, iPad/iPhone, Android phones/tablets and other software supporting 1296p format. 1296p is not compatible with Windows Media Player and Movie Maker.

Back to Index


11. Camera won’t connect to computer and/or charge

If the camera does not respond when connecting to your computer or wall charger, do this in order:

  1. Thoroughly clean the gold-plated USB contacts on the camera and USB adapter using a cotton swab or cloth moistened with isopropyl alcohol. Do not use pencil eraser or other abrasives to clean the contacts as that will remove some of the gold plating. If you see any sign of corrosion on the gold contacts of the camera, notify your local service center for repairs. If you see any sign of corrosion on the gold contacts of the USB adapter, replace the adapter (item # SL50103). Note: The USB adapter is not waterproof and needs to be replaced if it got wet.
  2. Make sure to only use the USB cable provided with your SeaLife Micro camera. Other micro-B type USB cables may not be compatible because of insufficient conductivity or lack of proper shielding. Replace the USB cable (item # SL51004) if you see any signs of corrosion or damage.
  3. Connect camera to the USB wall charger or computer. If the camera does not respond when making the connection, push and hold the power button for a full 10 seconds and keep it connected to wall charger (or computer) for at least 20 minutes. After 20 minutes, disconnect USB adapter and power on the camera. With camera powered on, connect camera to wall charger (or computer). The camera should respond to make connection and display PC – Charge – Ext Power options.

Important note: If the camera responds to computer connection [by displaying PC icon] but your computer does not show connection, it is more likely a failure with the 3rd or 4th USB contact pins, which are used for data connection. If thoroughly cleaning the USB contacts and replacing the USB adapter does not resolve the connection issue, please contact the SeaLife Service Center for repairs.

If you are still experiencing USB connection problem, please contact the USA SeaLife Service Center at service@sealife-cameras.com or contact the SeaLife distributor in your country by clicking here: https://www.sealife-cameras.com/dealer-locator.

Back to Index


12. Camera locks up

If you experience a camera lock-up, push the power button for 8 seconds to force-off the camera. Please report any lock-ups to SeaLife service center at service@sealife-cameras.com. Include camera serial # and any details about when the lock-up occurred.

Back to Index


13. Can’t find SeaLife Micro Cam app in App Store

Search App Store for “SeaLife Micro Cam” and select “iPhone Only” from the dropdown menu on the top left of your iPad. The SeaLife Micro Cam app works with iPhones and iPads.

Back to Index


14. Low audio volume when playing back video

The camera includes a microphone located inside the waterproof enclosure, which may be turned ON or OFF. When the microphone is turned ON, the volume is preset to the highest possible setting, however the video recording audio is minimal because of the waterproof design. Underwater, you will hear the diver breathing. Above water only loud sounds will be recorded. We recommend using Windows Movie Maker, Apple iMovie, YouTube or video editing software to add music or narrations to your final video production.

Back to Index


15. Replacing internal battery

The camera maintains 85% of its original power after 500 recharge cycles and 70% after 1000 recharge cycles. If the battery life becomes noticeably shorter, consider having it replaced by an authorized SeaLife service center for a cost of $147. Service includes new 3.7V 2350mAh Li-ion battery and waterproof depth testing to 200ft to ensure reliable waterproof seal. For more information, contact the USA SeaLife Service Center at service@sealife-cameras.com or contact the SeaLife distributor in your country by clicking here: https://www.sealife-cameras.com/dealer-locator

Back to Index


16. Connecting Micro 2.0 to an iPhone or iPad with USB cable

Here is how to connect the Micro 2.0 camera to an iPhone or iPad using a USB cable and camera adapter. A wired connection results in much faster download speed compared to wireless connection. This only works with iPhones/iPads and not with Android smartphones/tablets.

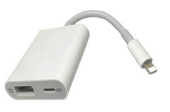
You will need an “Apple Lightning to USB 3 Camera Adapter”, which is available at most Apple Stores or online.

Here’s a diagram showing the connection configuration:

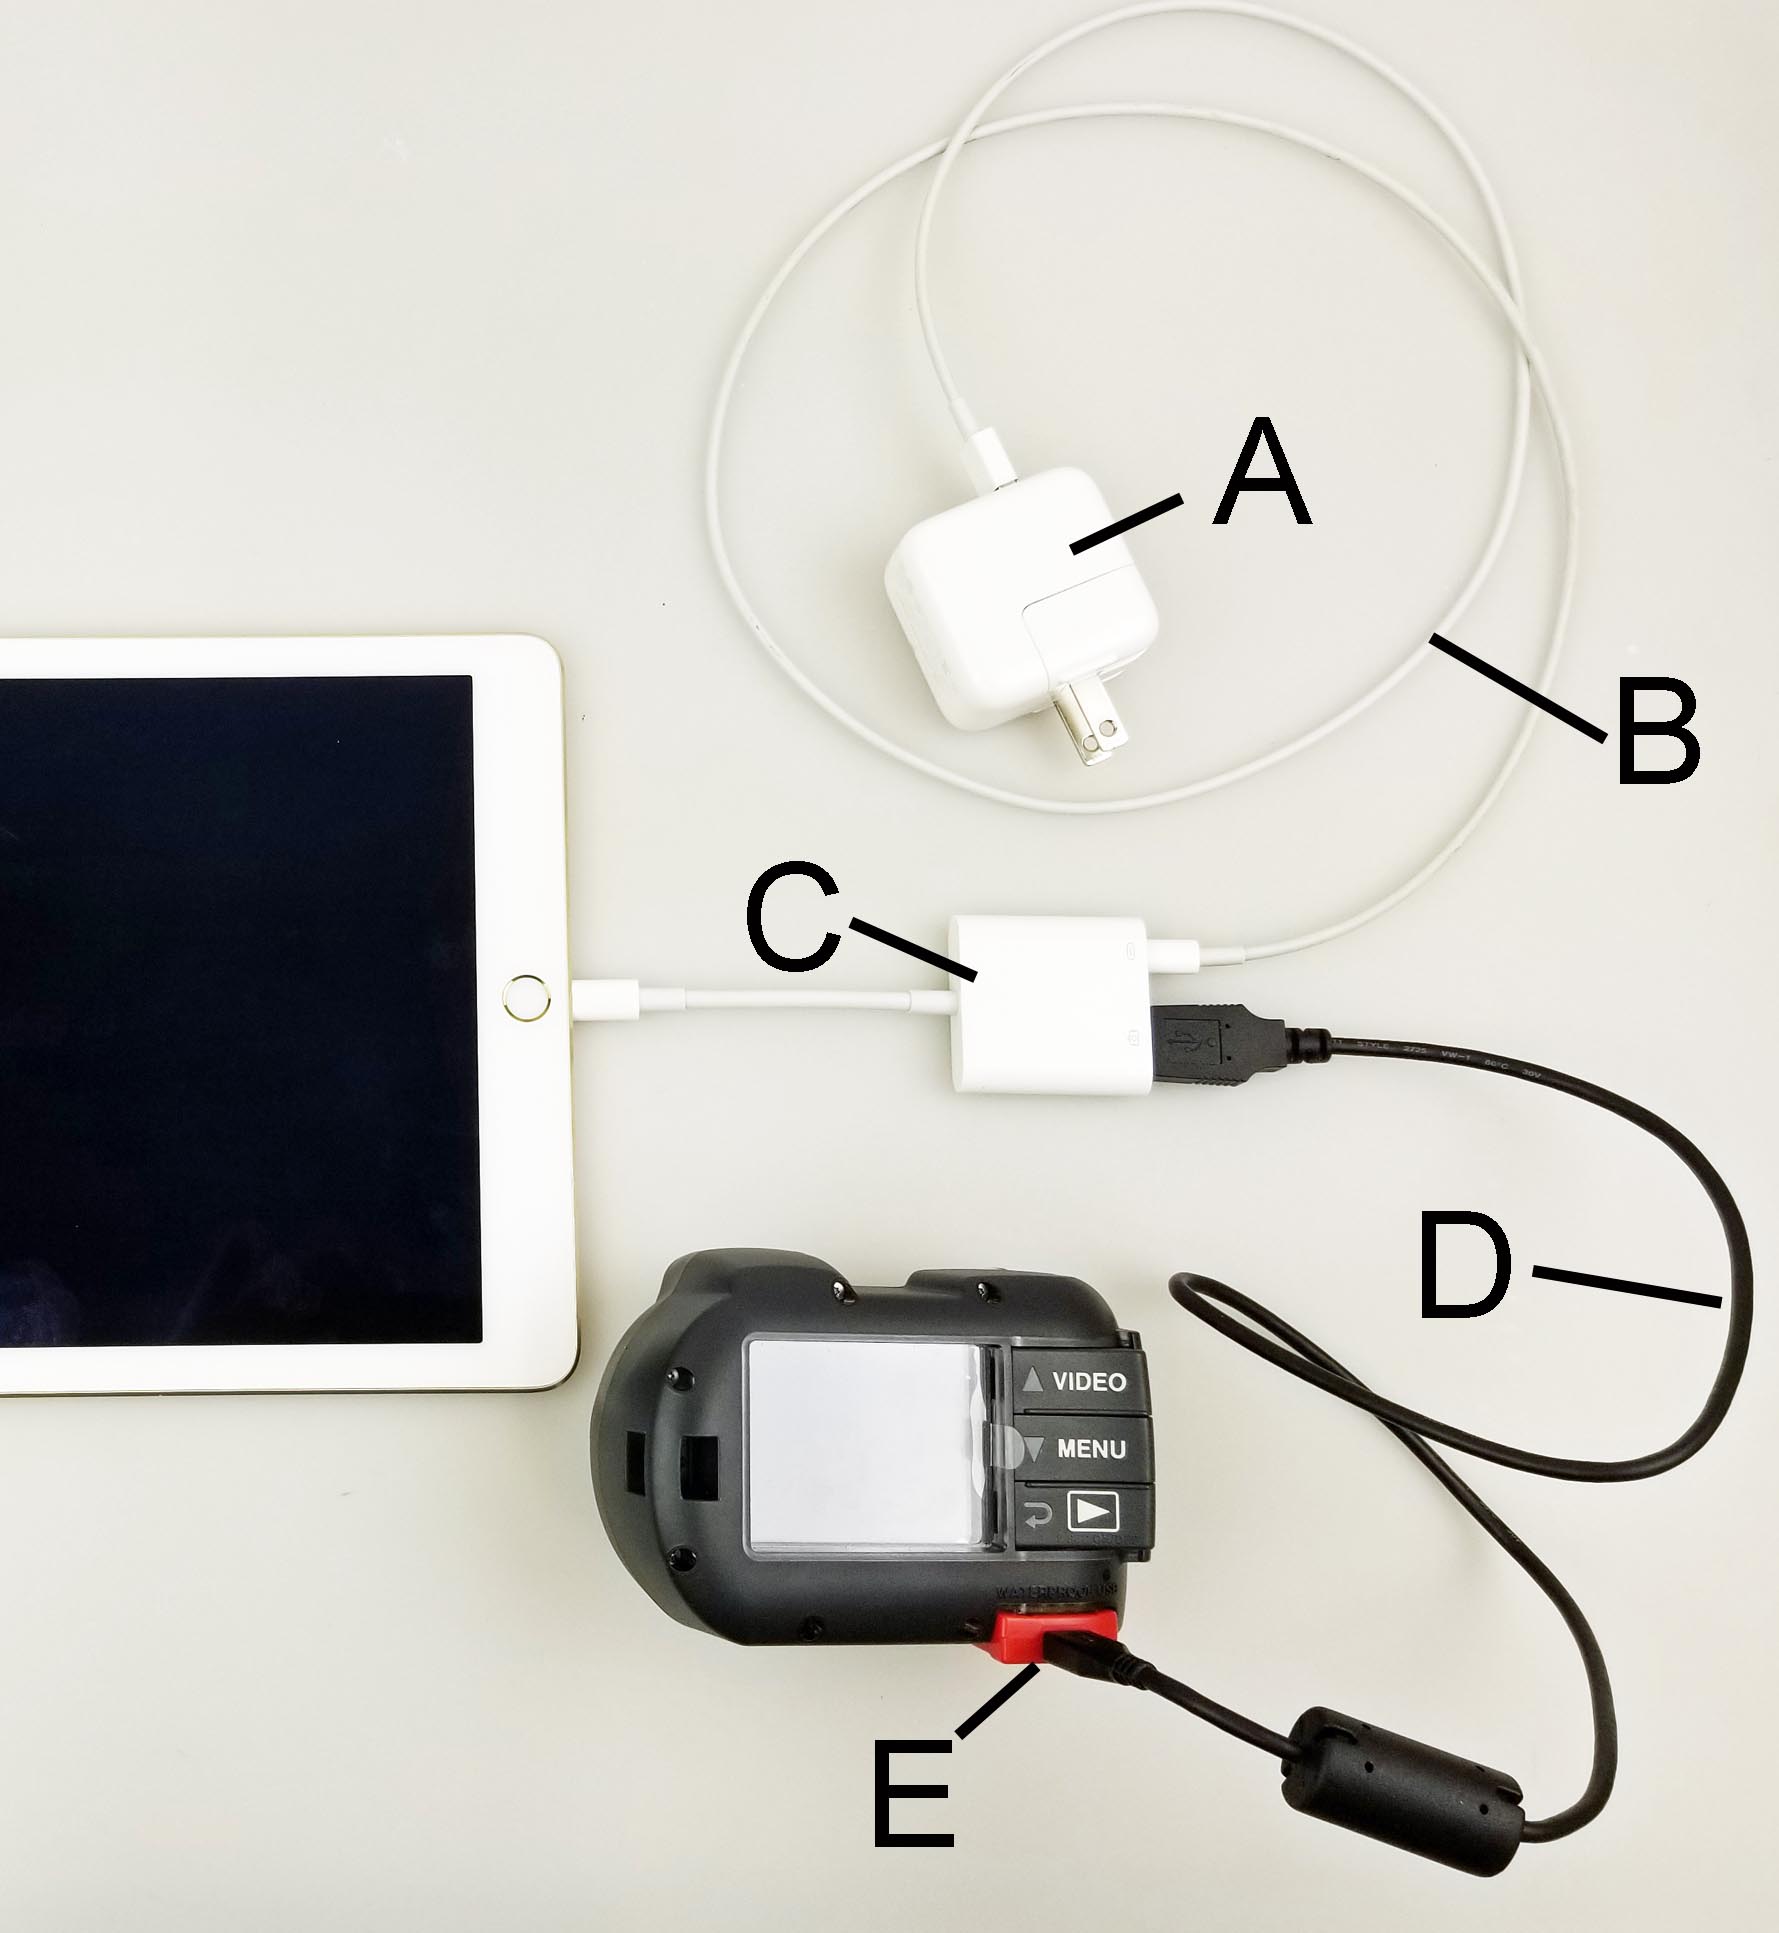
A = USB wall charger. Important: For iPads, you must use a larger 5V 2A wall charger. For iPhones, you can use a 5V 2A or 5V 1A wall charger.
B = Apple Lightning USB cable
C = Apple Lightning to USB 3 Camera Adapter
D = SeaLife USB cable included with the Micro camera.
E = SeaLife USB adapter included with the Micro camera.

Here is a video showing the connection procedure –

Back to Index


17. Can’t make Wifi connection to Amazon Kindle device

Even though the Kindle runs on the Android operating system, the SeaLife Micro Cam app or Action Cam HD app is not available in the Amazon app store. It is not possible to make wireless connection between Amazon’s Kindle and SeaLife Micro HD, HD+ or 2.0 cameras.

Back to Index


18. Can’t make WiFi connection to laptop or desktop computer

The SeaLife Micro HD+ and 2.0 cameras only support wireless connection with Android or Apple smartphones / tablets, not with laptop or desktop computers.

Back to Index


19. Battery life when using camera in extreme cold temperatures

The camera is designed to be operated at temperatures of 0°F to 120°F (-18°C to 50°C) on land and +33°F to +110°F (.5 °C to 44°C) underwater. When using the camera in extreme cold temperatures, the battery life at full charge will be less than when operating at normal room temperatures.

Back to Index


20. Recording continuous video

The Micro 2.0 camera is capable of recording continuous video as long as there is sufficient memory space and battery power available. The continuous video will be saved as individual files about 6 minutes in length (approximately 430MB) to make transferring and managing video files easier.

Back to Index


21. Pictures / videos not sharp or out of focus

There are many factors that may contribute to pictures or videos not being sharp. Most common is shooting in low light conditions, which can cause a grainy image or motion blur. Consider purchasing a Sea Dragon external photo-video light ideal for capturing sharp, colorful pictures and videos underwater or in low light conditions.
The camera uses a fixed focus lens that is sharp from 12” (30cm) to infinity. Make sure to maintain at least 12” (30cm) distance between the camera and the subject. For close-up shooting distances of 6” to 24”, consider purchasing the SeaLife 10X Close-Up lens at your local SeaLife dealer. To find a dealer near you, click here: https://www.sealife-cameras.com/dealer-locator

Back to Index


22. Picture size is too small and grainy when enlarged

Still images taken at 16mp will have image resolution of 4608×3456 pixels and the file size can range from 2.1MB up to 2.7MB or higher, depending on color and “information” contained in the image. If the image resolution and file size is smaller, you most likely took a lower resolution photo, which will appear grainy when enlarging it. The camera features a Picture-In-Video feature, which allows you to take a lower resolution (maximum 2 megapixels or 1920 x 1080) photo while recording video and pushing the shutter button. The file size for 2 megapixel picture-in video images ranges from 0.8MB up to 1.4MB depending on color and “information” contained in the image.

Back to Index