
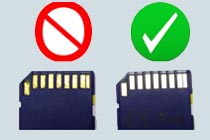
The Moisture Muncher capsule design has changed slightly. One end has a cap that won’t fit into the Moisture Muncher slot of the DC1400 housing. Only insert the thinner end into the slot as shown below. The housing will still close properly without interference and maintain a waterproof seal.

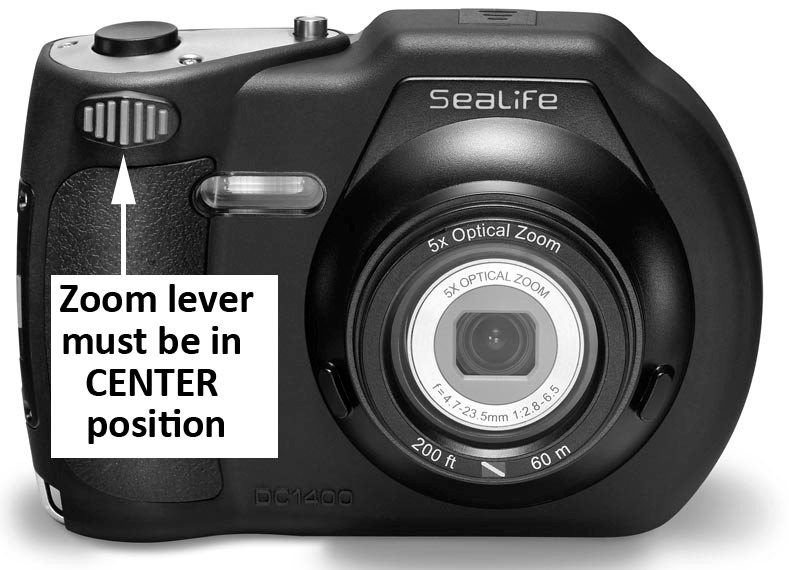
If the Focus, Flash and/or Menu buttons on the back of the housing don’t work, the zoom lever did not return to the center position or the shutter button is sticking.
- Make sure to center the zoom lever after using it.
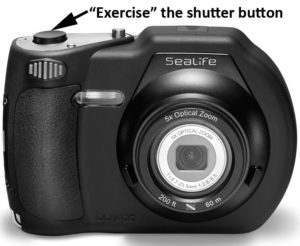
- “Exercise” the shutter button after it’s been in storage by pushing it up/down until the button operates smoothly and quickly returns to its upright position. Also, push up on the shutter from the inside of the housing to exercise the button’s full range. If the shutter button is sticky and does not return to its uppermost position, the Focus, Flash and Menu buttons will not function.
- Thoroughly rinse housing in fresh water after each use. Periodically soak the sealed housing in warm fresh water for about 20 minutes. Push all the buttons about 20 times to flush out any debris trapped. Allow housing to completely dry before storage.
Note: If the above information does not resolve the issue, please contact your local authorized SeaLife dealer or the distributor/service center in your country for possible repair service. Repair options for the DC1400 are limited because the item has been discontinued over 5 years ago and most parts are no longer available.
Effective July 2019, the DC1400 battery (SL16134) and charger (SL70036) have been discontinued. Spare batteries and chargers may be purchased at your local consumer electronics retailer or online. Here are a few batteries and chargers that we have tested to be compatible with the DC1400:
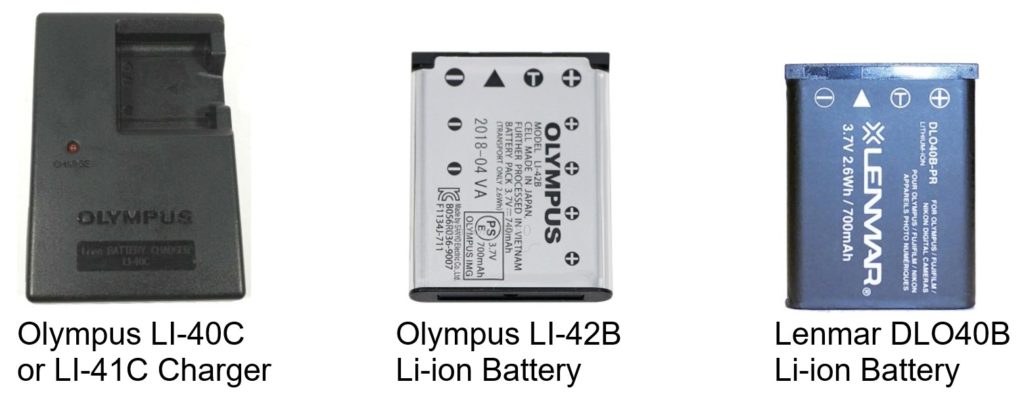
Note: Olympus, Lenmar and other aftermarket batteries can only be charged in a charging tray accessory, not inside the camera. Use the SeaLife SL70035 or Olympus LI-40C/LI-41C charging tray
There are two types of lithium ion rechargeable batteries that have been supplied with the SeaLife DC1400 camera: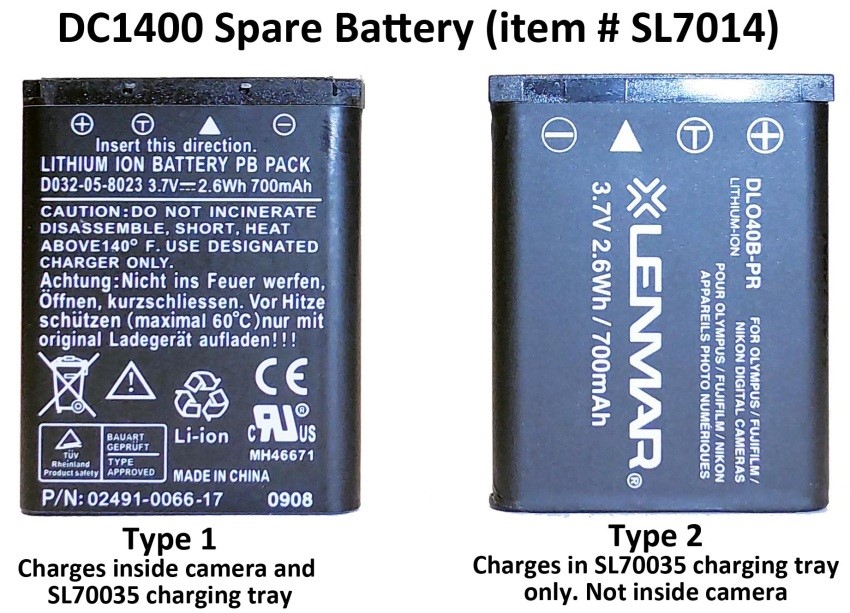
The type 1 battery may be charged inside the camera or the SL70035 charging tray. The type 2 battery may only be charged in the SL70035 charging tray, not inside the camera.
Here is a list of what battery type is included with SeaLife items:
Type 1 Battery: DC1400 Camera (SL720), DC1400 Reef Edition (SL721), Spare Battery (SL7014 Spare Battery)
Type 2 Battery: All DC1400 camera sets and Charging Kit (SL7216) this items include a charging tray.
Shutter lag is the time between pushing the camera’s button and image capture. The DC1400’s shutter lag can be as fast as 0.3 seconds when set to infinity focus or Quick Shot mode, or as slow as 2 seconds in Macro or Super Macro focus. The primary reason for this time difference depends on the camera’s auto focus setting.
In order to find the sharpest focus point, the camera evaluates a hundred focus steps and selects the sharpest one. In Macro and Super Macro focus setting the minimum-maximum focus range is wider compared to the normal auto focus setting, so there are more focus steps to evaluate, which takes a little more time.
Here are some tips on selecting the correct focus setting and minimizing the shutter lag time.
- Select the optimal focus mode depending on the shooting distance and camera setup. There are four primary focus settings useful for underwater photography and videos:
- Auto: Camera will automatically focus from 6in / 15cm to infinity.
At 5X zoom, the focus range increases to 2ft / 60cm to infinity.
This focus mode is ideal for most underwater applications. - Macro: Camera will automatically focus from 3in / 8cm to infinity.
At 5X zoom, the focus range increases to 2ft / 60cm to infinity. This focus mode is ideal for close-up applications and necessary when shooting with SeaLife SL975 Fisheye lens. - Super Macro: Camera will automatically focus from 1in / 2.5cm to infinity and lock the zoom at 3X. This focus mode is ideal for close-up pictures of tiny sea critters. It may also be used when shooting with SL975 Fisheye lens.
- Infinity: icon-Focus_infinity Camera locks focus at infinity, so anything beyond 2ft / 60cm is in focus. The shutter response (lag) time is the fastest when set to Infinity focus. Ideal for shooting larger objects that are farther away. For example, sharks, whales, rays, wrecks, other divers, etc.
- Auto: Camera will automatically focus from 6in / 15cm to infinity.
- The camera will focus on the subject located in the center of the picture frame. Align the focusing square located in the center of the LCD over the subject. Subjects outside this square may not be in focus.
- Before taking a picture or recording video, push and hold the shutter button half way to focus the camera on the subject. The focus frame in the center of the LCD display will disappear for a second and reappear as green or red. A green focus frame means the camera accurately determines the focus. A red focus frame means the camera did not accurately determine the correct focus – make sure focus setting is correct and that there is sufficient lighting.
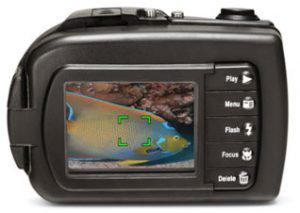
A green focus frame indicates the auto focus is good.

A red frame indicates the camera is not focused on the subject.
- In order for the camera to quickly and accurately focus, there must be sufficient light to illuminate the subject. The camera cannot focus on something it does not “see.” In low light conditions, use the SeaLife Sea Dragon Photo-Video Light accessory to help the camera focus in low light conditions and produce brighter, more colorful results.
- QUICK SHOT MODE: When Quick Shot is set to ON, the camera takes a picture without using the auto focus. This will speed up the camera’s shutter response time (i.e. shutter lag) to about 0.3 seconds. The focus locks to the shooting distance of the LAST picture taken before turning on Quick Shot.
Here’s an example of how to use Quick Shot:
- With Quick Shot turned OFF, set the camera to normal auto focus and take a picture of something at 3ft/1m shooting distance.
- Now set the Quick Shot to ON – The camera focus will remain locked a shooting distance of 3ft until Quick Shot is turned off or camera is powered off.
- Note: When powering off the camera, the Quick Shot focus distance is not saved and will be set to infinity focus. When Quick Shot is ON, the focus frame on the camera’s LCD display will not turn red or green.
Quick Shot mode is useful when taking a series of pictures at the same shooting distance and shutter response time is an important factor. Remember to turn Quick Shot OFF if you want to resume using the camera’s auto focus.
Quick Shot mode is also very useful when shooting with the SeaLife Fisheye wide angle lens accessory (SL975) because the lens has an extremely wide depth of field. Set the camera to macro focus and take a picture of something at 3ft/1m shooting distance, which represent “infinity” focus distance. Now, turn Quick Shot mode ON. The camera’s auto focus is now locked to “Infinity” focus range. All subsequent pictures taken at shooting distance of 18”/45cm to infinity will be in focus. Without the fisheye lens, the focus range would be 2ft to infinity.
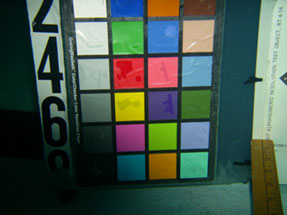
Hot spots may occur in extreme lighting conditions where you have small bright, reflective areas among mostly dark areas of the video scene.
For example:
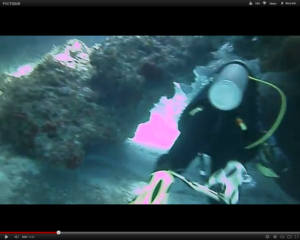
If this occurs, set the camera’s white balance to “BluWtr<25ft” (Blue Water less than 25 feet). Using “BluWtr>25ft” (Blue Water great than 25 feet) adds too much color correction under these brighter light conditions.
If the camera displays a “Card Error” warning or the camera is not operating properly with the memory card installed, check the following. It’s not uncommon that a memory card works in one camera brand/model and not in another. You might be inclined to fault the camera, but in almost all cases comes down to the memory card.
- For the SeaLife DC1400, it is recommended to use SDHC memory cards with a capacity of 16GB or less and read/write speed no faster than “Class 10.” Using a memory card in excess of these recommended specifications may cause compatibility problems.Note: We have identified a batch of Delkin 16GB cards that is not compatible with the DC1400 camera. If you get a “Card Error” or erroneous “No Image” message, please contact your local authorized SeaLife dealer or the distributor/service center in your country for repair service. The erroneous “No Image” message appears after taking a picture and pushing the Playback button.
- Format the memory card before its initial use or after the card has been used in another device. Warning: formatting the card will erase all the images and data on the card.
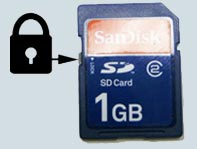
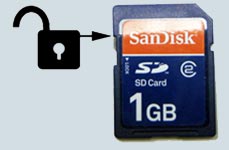
- Make sure the card is not locked:
- Make sure the contacts on the card are clean and the card is not damaged.
- If the memory card is still not working in your SeaLife camera, replace it with another brand or size. There may be a problem with the card’s controller chip or some other internal defect. Keep in mind that it’s not possible for SeaLife to approve or not approve a particular memory card brand, because the same card brand, size and speed may use a different controller.
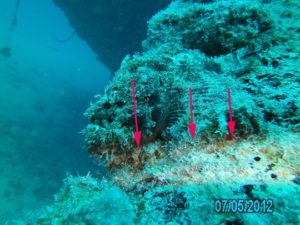
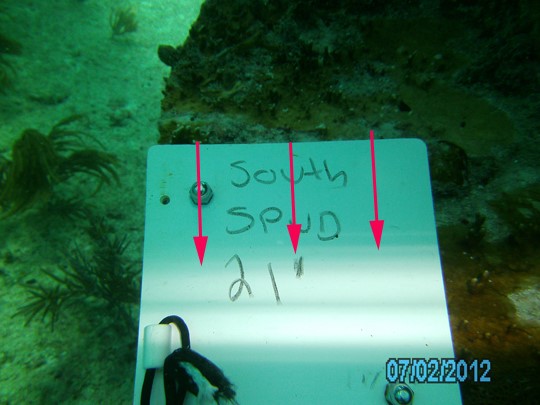
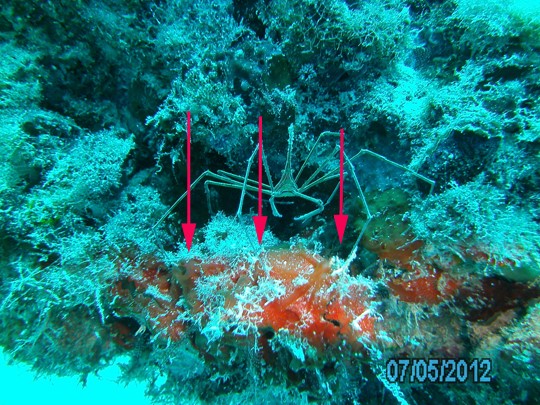
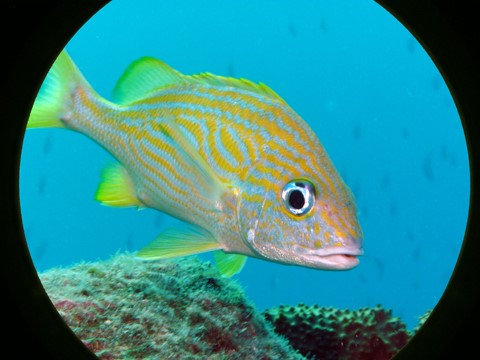
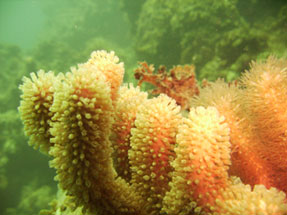
When using the SL975 fisheye lens with your DC1400 camera and aiming the camera toward the sun or other bright light source, you may see the inner camera lens ring reflection in the picture.
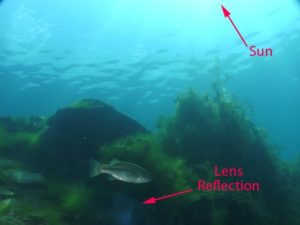
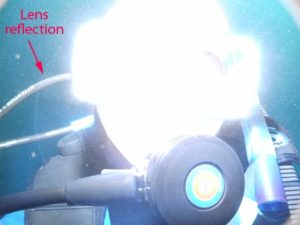
The above two pictures show examples of the light conditions or shooting angles which may cause lens reflection.
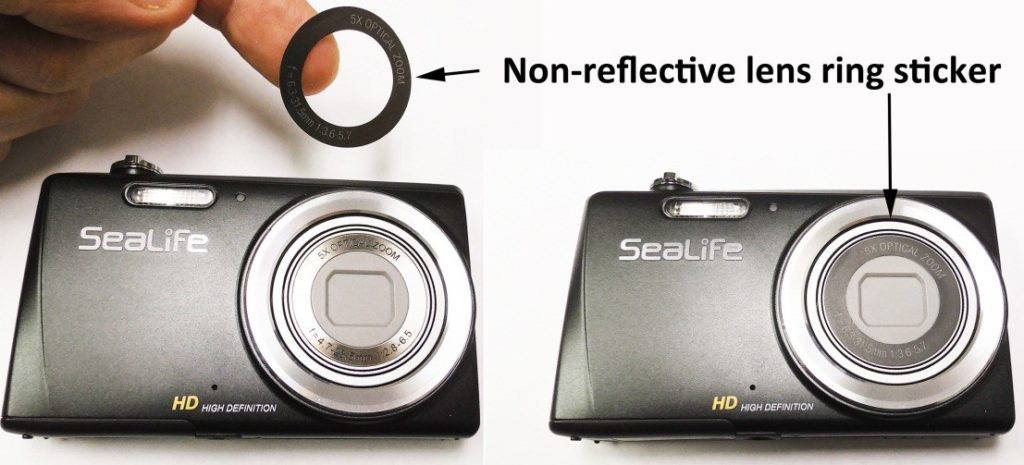
If you see lens reflection in your underwater pictures, SeaLife makes available (at no charge) a non-reflective sticker which attaches to the inner camera lens ring. Please contact the SeaLife Service Center in your country to obtain a free non-reflective ring sticker (item # SL18035).
If you see a horizontal line in the picture when using the Digital Pro Flash (SL961), the Flash
Link Adapter or Flash Diffuser is not installed correctly. Here is what the picture looks like if the Flash Link Adapter is not installed correctly:
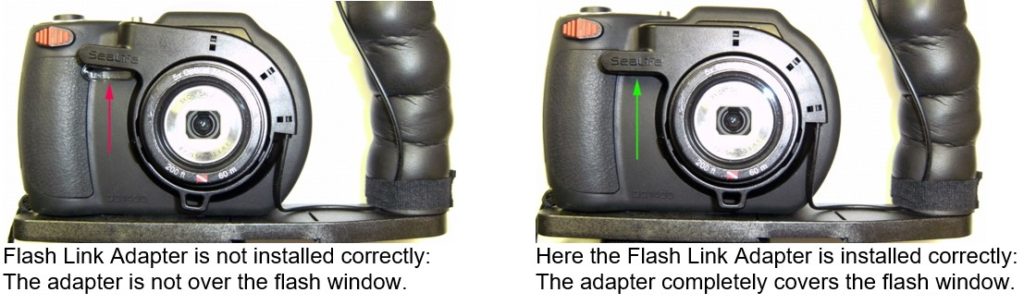
Flash Link Adapter is not installed correctly: The adapter is not over the flash window.
Here the Flash Link Adapter is installed correctly: The adapter completely covers the flash window.
Using the SeaLife SL970 wide angle lens accessory with the DC1400 will cause it to vignette (black frame around picture). The DC1400 already has a built-in 26mm wide angle lens.
The DC1400 auto focus system has a focus range of 1” (2.5cm) to infinity. Here is some important information on how to avoid taking out-of-focus pictures:
- Make sure you select the correct focus mode. There are 6 options – Normal AUTO, AF Tracking, Face Detect, Macro, Super macro and Infinity. Refer to page 24 of the DC1400 instruction for information on each focus mode
- The camera will focus on the subject located in the center of the picture frame. Align the focusing square located in the center of the LCD over the subject. Subjects outside this square may not be in focus.
- Before taking a picture or recording video, push and hold the shutter button half way to focus the camera on the subject. The focus square in the center of the LCD display will turn green if the camera accurately determines the focus. If the focus square is red, the camera did not accurately determine the correct focus – make sure focus setting is correct and that there is sufficient lighting.
A green focus frame indicates the auto focus is good. A red frame indicates the camera is not focused on the subject.
- In order for the camera to automatically focus on the subject there must be sufficient ambient light to illuminate the subject. The camera may not “see” the subject in low light. The subject must also have some contrast. For example, it is difficult for the camera to focus on a white wall with no contrast. Use the SeaLife Photo-Video Light (item SL980 – sold separately) to help the camera focus in low light conditions.
- QUICK SHOT MODE: When Quick Shot is set to ON, the camera takes a picture without using the auto focus. This will speed up the camera’s response time (i.e. shutter lag). The focus will be locked to the shooting distance of the LAST picture taken before turning Quick Shot On. For example, with Quick Shot turned OFF, set the focus to Macro and take a picture of something at 6” shooting distance. Now set the Quick Shot to ON and the camera focus will remain locked a shooting distance of 6”. When Quick Shot is ON, the focus frame on the camera’s LCD display will remain gray and not turn red or green. When powering off the camera, the Quick Shot focus distance is not saved and will be set to infinity focus. This mode is useful when taking a series of pictures at the same shooting distance and shutter response time is an important factor. Important: Remember to turn Quick Shot OFF if you want to use the camera’s auto focus.
- When using the SL975 Fisheye Lens accessory, make sure camera is set to Macro or Super Macro focus. Also make sure Quick Shot mode is turned OFF.
- When switching from picture mode to video mode the auto focus needs to be set to macro. The focus setting for picture and video modes work independently. Once you set the video mode focus to Macro, it will keep that setting when switching between picture and video mode or turning off the camera.
A dark area in the lower left corner of your image can occur when taking close-up pictures and the camera’s internal flash fires. The dark area or shadow is caused by the underwater housing lens extension which partially blocks the camera’s internal flash.
There are 3 ways to eliminate this shadow effect:
- Turn the camera’s internal flash OFF. This is recommended because the camera’s internal flash is not very powerful and only reach about 2ft, at best. Also, the underwater color correction filter (in Dive and Snorkel modes) will only work when the flash is turned off. Turning on the flash cancels the color correction feature.
- Use the flash diffuser included with our DC1400 camera. Only use the camera’s internal flash for macro pictures within 12” (30cm) shooting distance.
- Use the SeaLife Digital Pro Flash (flash accessory sold separately). The SeaLife Pro Flash accessory has a flexible arm that allows you to aim the flash head in virtually any direction. It will eliminate the shadow effect and also produce brighter, more colorful underwater pictures with less backscatter.
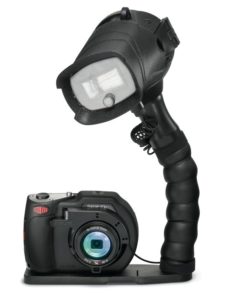
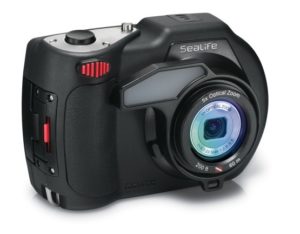
DC1400 shown with SL961 Pro Flash