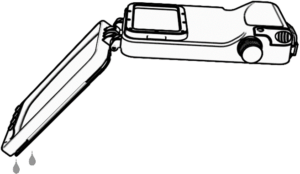
- Make sure you and the SportDiver housing are completely dry when releasing the vacuum pressure and opening the waterproof door. Releasing the pressure with a wet finger will result in water drops getting forcefully pulled into the housing, which may cause fogging on your next dive.
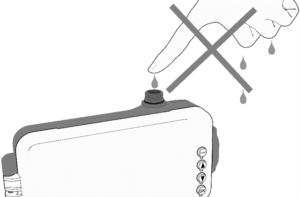
- After use, dry the housing with a towel. Before opening the waterproof door, ensure you and the housing are completely dry. Open the door with the back of the housing facing down (lens facing up) to prevent water drops from entering the housing, which may cause fogging on your next dive.
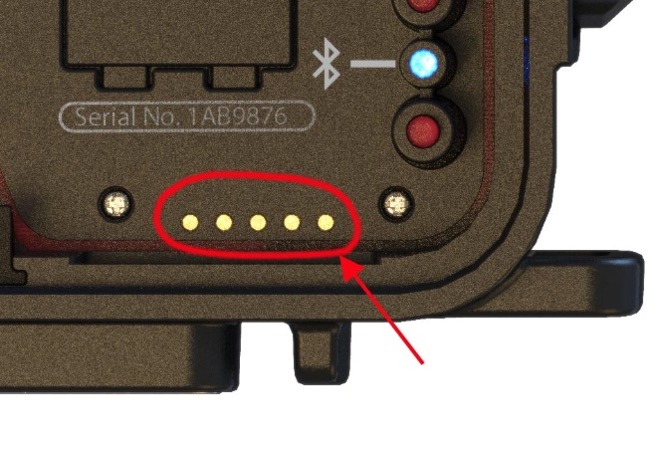
The 5 gold-plated wet sensor contacts are located on the inside, bottom right of the housing. The leak alarm will activate if anything conductive (i..e. water drops, skin/finger, etc.) touches the wet sensor contacts.
If the leak alarm is activated, a “Leak Detected” message will appear on the display for 5 seconds and the housing will beep 5 times. If this happens during your dive, surface SAFELY in accordance with safe diving practices. Power off the housing. Use a cotton cloth to clean and dry the housing and phone. Inspect the O-rings for damage, twisting and sand/hair/debris. Clean and lube the O-rings or replace if damaged.
If the above information does not fix the issue, please contact the SeaLife Service Center in your country. For a list of dealers/distributors that can offer repair service, please visit the SeaLife website at www.sealife-cameras.com/dealer-locator/
The pre-dive vacuum pressure test checks if the housing maintains an airtight seal before diving. If the housing loses internal vacuum pressure during the test, the phone will display “Leak Detected” or “Keep Pumping”, depending on the amount of pressure loss.
Here are the most common causes and solutions for frequent failures of the pre-dive vacuum pressure test:
- If the SportDiver housing temperature changes during the pre-dive pressure test, the air inside the housing will expand or contract and may cause the test to fail. For example, taking a SportDiver housing from a cool air-conditioned room to the warm outdoors. Allow the housing to adjust to the ambient temperature before starting the pre-dive vacuum pressure test. Another example is inserting a hot phone into the housing before starting the test. Force close apps running in the background and allow the phone to cool down before starting the pressure test.
- One or both O-ring are not lubed, dirty or damaged. Clean the O-rings and apply very thin film of lube. Replace the O-ring if cut or damaged in any way. One free O-ring set is included with each SportDiver Ultra. A spare O-ring set may be purchased at your local authorized SeaLife dealer. See item # SL40510.
- The O-ring is not installed correctly. The O-ring is “D”- shaped. The flat side of the O-ring must be against the O-ring groove with the round side facing outward. Also, make sure the O-ring is not twisted and that the corners of the O-ring are aligned with the shape of the waterproof door.
- The yellow one-way rubber valve at the vacuum check port is damaged or has some sand/debris trapped underneath. Clean the one-way valve using lint-free cloth moistened with alcohol. Use pressured air to blow out any sand/debris trapped underneath the one-way valve. If the one-way valve is damaged, contact the SeaLife Service Center in your country. For a list of dealers/distributors that can offer repair service, please visit the SeaLife website at www.sealife-cameras.com/dealer-locator/. Note: Screw on waterproof cap after applying vacuum pressure and always make sure waterproof cap is installed when diving.
If the above information does not fix the issue, please contact the SeaLife Service Center in your country for assistance. For a list of dealers/distributors that can offer repair service, please visit the SeaLife website at www.sealife-cameras.com/dealer-locator/
If the pressure gauge needle does not move when pumping the handheld vacuum pressure pump, do the following:
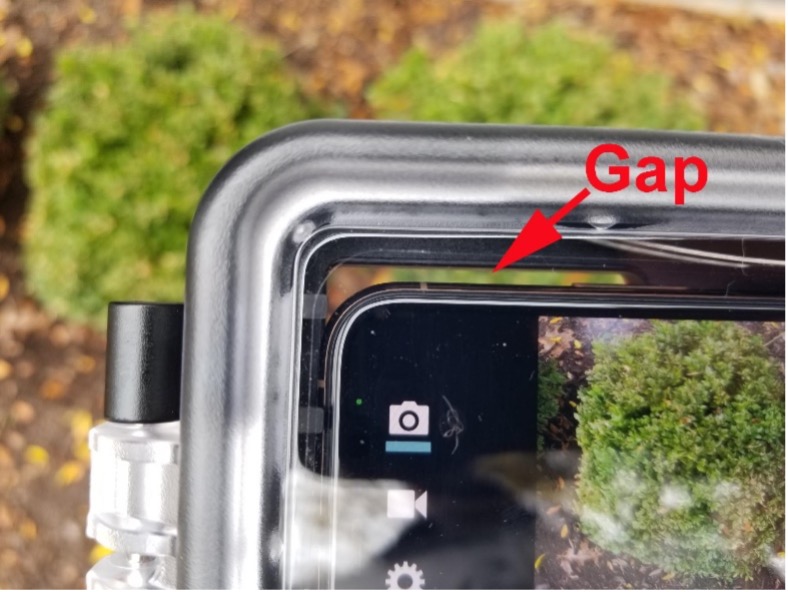
When sealing the housing with the cam-lock latch, you will see a small gap along the top between the door and the housing. Applying internal vacuum pressure usually pulls the door into the housing and eliminates the gap. If not, use your hands to squeeze the door into the housing, which closes the gap and allows the pump to apply internal vacuum pressure. Make sure the vacuum check port cap is removed, and the red seal is lubed and correctly seated into the seal gland without twisting.
 Gap between door and housing
 No gap between door and housing
The SportDiver housing vacuum pressure check (leak analysis) works up to altitude of 6500 ft / 1980 m (11.6 psia). At higher altitude, the SportDiver LED status indicator will show red/green/yellow error code.
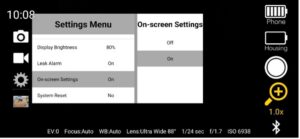
When diving at altitudes higher than 6500 ft, you will need to disable the leak alarm in the SportDiver app Settings Menu. Make sure you carefully set up the housing to avoid a leak – inspect, clean and lube O-rings, and properly seal the waterproof door. You also need to add pumps of vacuum pressure
after sealing the housing even though the leak alarm is disabled. The vacuum pressure helps the waterproof door to fully seat itself into the housing, creating a strong seal.
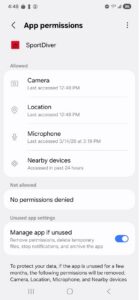
The SportDiver app includes a Leak Alarm On/Off setting, however we do not recommend disabling the pre-dive vacuum pressure leak alarm unless diving at high altitude (See above). If you decide to turn off the Leak Alarm setting for some other reason, please understand that you are doing so at your own risk.
Important: Turning off the Leak Alarm setting will only disable the 3.5-minute pre-dive vacuum pressure check. The on-screen pressure gauge and “Keep pumping” message will not be displayed. The wet sensor leak alarm cannot be turned off and will remain enabled. You should still add two to three pumps of vacuum pressure after sealing the housing. The vacuum pressure helps the waterproof door to fully seat itself into the housing, creating a strong seal.
The internal vacuum pressure must be released before the housing can be opened. Unscrew the vacuum check valve cap. Use your dry fingertip to move the rubber yellow 1-way valve sideways to release the pressure. Do not push down the valve as that will not release the pressure. You may also use some dull object, like a pen cap, to move the valve sideways. Never use a sharp object near the rubber 1-way valve.
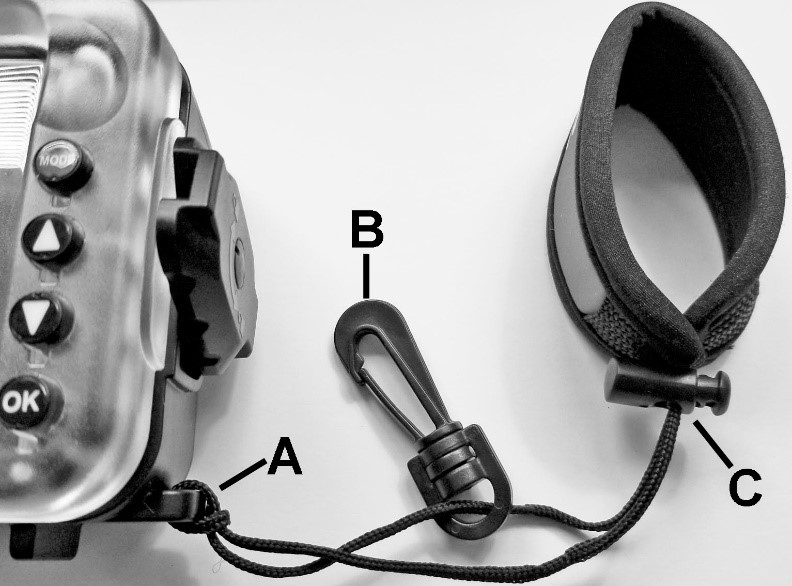
The housing wrist strap included with the SportDiver Ultra attaches to the housing as shown below. Attached the looped end of nylon cord through the housing strap connector (A). The clip (B) is used for attaching the camera to your BCD (buoyancy Control Device) D-ring. Adjust the sliding lock (C) to tighten around your wrist.
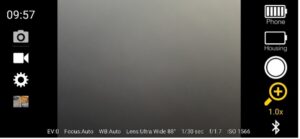
Humid air or water drops trapped inside the underwater housing may condense on the cooler glass lens port and cause fogging. Here is the best way to prevent fogging:
- Do not allow any water drops to enter the inside of the housing. Even one water drop can evaporate and condense (fog) on the lens port.
- The phone must be completely dry before inserting it into the UW housing.
- Load the phone and housing in a dry environment, like an air-conditioned room. This will help to avoid trapping humid air inside.
- Avoid letting the housing get hot or sit in direct sunlight for pro-longed periods of time.
- Avoid opening the housing in a humid environment. If you need to charge the phone between dives, make sure you and the phone are dry before opening the housing.
- Use a fresh Moisture Muncher desiccant capsule (item # SL911) inside the housing.
Glare in the upper left corner may occur when a bright light or sunlight is behind you and there is an air gap above the phone. Light is passing through the air gap and reflecting off the inside of the glass lens port.
 Glare in the upper left corner
 Air gap above top of phone
To eliminate the glare, use larger rubber grip tabs along the bottom to fill the air gap. If there is still a gap after changing the grip tabs, attach one self-adhesive, anti-glare strip to the inside top of the lens port. Do not stick the anti-glare strip to the glass lens.

Some Google Pixel Pro phones have a tiny LED located below the wide lens, which is only visible in low light. Applying a small piece of black electrical tape directly under the Wide lens eliminated the glare issue. We are looking into a software solution for this issue and will release an app update when a solution is found.
 Glare spots appear in the lower right corner of the
 Tape placed over light source
The volume button is being pressed accidentally. Move the rubber grip tabs around so they do not touch the iPhone buttons. Refer to page 14 of the manual.
Move the rubber tip sideways to release internal vacuum pressure. Pushing the yellow 1-way valve down will not release pressure.
Here are some common causes and solutions for the rear housing buttons not working:
- No vacuum pressure has been applied to the sealed housing. Applying vacuum pressure moves the waterproof door assembly closer to the internal buttons, ensuring the buttons make proper contact.
- The rear housing buttons are sticky and do not return to the normal resting position. Soak the sealed housing in fresh water for 20 minutes. Push each button 20 times to flush out any sand and debris that may cause the buttons to stick.
- No Bluetooth connection between the housing and installed phone. Make sure the Bluetooth icon on the bottom right of the SportDiver app display is blue, indicating the housing has a Bluetooth connection with the phone.
If the above information does not fix the issue, please contact the SeaLife Service Center in your country for assistance. For a list of dealers/distributors that can offer repair service, please visit the SeaLife website at www.sealife-cameras.com/dealer-locator/
We recommend using two standard alkaline AAA batteries, which will last about 50 hours of continuous use. Single-use lithium and NiMH rechargeable AAA batteries may also be used in the SportDiver with no known side-effect. When using non-alkaline batteries, the housing battery strength indicator on the top right of the SportDiver app display may not be accurate because NiMH and lithium AAA batteries operate at slightly different voltages than alkaline batteries.
Slide the phone over to the right (towards the latch) before lifting the phone out from the housing. If the left side of the phone is up against the grip tabs when you lift the phone out of the housing, it will lift the grip tabs up and out of the slots.
If the SportDiver housing does not power on, please try the following troubleshooting steps.
- Replace the AAA batteries. Make sure the battery contacts are clean.
- Inspect the housing’s gold-plated battery contacts for corrosion. Look closely because corrosion on the contacts is difficult to see. As a temporary solution, use a wire brush or scraping tool to remove the corrosion from the contacts. The long-term solution is to have the battery contacts replaced by an authorized SeaLife service center.
If the above information does not fix the issue, please contact the SeaLife Service Center in your country for assistance. For a list of dealers/distributors that can offer repair service, please visit the SeaLife website at www.sealife-cameras.com/dealer-locator/
It’s normal for the phone to become hotter than normal because it is sealed inside the housing with limited ventilation. However, the phone should not become hot enough to affect performance or display “overheating” message. Here are some tips on keeping the phone as cool as possible.
- Force-close all apps running in the background. Apps running in the background can also use more power and drain the battery faster than normal.
- Turn Airplane Mode on, which turns off WiFi and Cellular. Only the Bluetooth wireless setting should be enabled.
- Avoid exposing the sealed housing to direct sunlight for prolonged periods of time.
- Set the Power Save mode to 1 minute. This will dim the display and turn off the camera after 1 minute of non-use. Pushing any button will exit the power save mode.
- Some phone models tend to run hotter than normal. If the phone is still becoming too hot after following the above advice, turn off locations (GPS), reduce the screen brightness to 60%, avoid lengthy video recordings, and restart your phone.
If you see the “Prepare phone” during your dive, it means something caused a temporary power interruption, which restarted the housing. The most common cause is water damage to the power switch or internal electronics, or corrosion on the battery contacts. Repair service is needed.
As a temporary solution, you may disable the Leak Alarm setting in the SportDiver app. This can be done while underwater, so you can continue the dive without seeing the “Prepare phone” message and pressure gauge. You know the housing is waterproof because it has already successfully passed the 3.5-minute pre-dive leak analysis. Turning off the Leak Alarm setting only disables the pre-dive leak analysis. It does not disable the wet sensor leak alarm.

 .
.